Cory’s Turkey Burgers

Nothing screams summer liked grilled burgers.  Am I right?  Of course…I’m always right.  Just ask my husband.  LOL  🙂 

Only kidding.  But let’s be honest, with temperatures in the 80s and the sun shining, there is something about grilling burgers for dinner.  Not to mention, they are fast, easy, and simply delicious.  So this week, with the perfect grilling weather in the forecast, I want to share with you my brother-in-laws Turkey Burgers!  I remember the first time he made this for us. We had just finished the Madison Quarter Marathon and we were grilling & celebrating at Cory’s.  I thought to myself, “Great.  Turkey.  I wonder if they’ll taste funny.”  You know…you expect a burger to taste the way a burger always tastes…like beef.  Or maybe that is just the “Wisconsin” coming out in me. 

And then…I took a bite.  Cory’s Turkey Burgers were incredible!  And had he not told me…I would have never known they weren’t beef.   Juicy…flavorful…AMAZING…and to some extent, healthy.  I was sold.  We love these burgers!


And here he is…our Grill Master.  Serious, huh?!   Burgers, Corn, Pizza…He continues to teach us new grilling recipes.   Thank you Cory!

TURKEY BURGERS

Serves 6

40 oz. ground turkey (7% fat – not lean! You need some fat for juicyness)
2 Tbsp. plain yogurt or sour cream
2 Tbsp. mustard
2 tsp. Worcestershire sauce
2/3 cup grated cheese (doesn’t matter what type – just not a dry cheese)
2 tsp. ground pepper

Add all ingredients and mix well by HAND – really mush that stuff together – more mushing the better!  Pat out 6 bugers – about an inch thick – really, don’t make ’em thin!  Top with pepper or steak salt to reduce sticking.

Prepare a fire or turn on the grill.  You’ll need 2 temp zones – High and Medium-Low.

Once the grill has come up to temp – oil the grates (olive oil).   Be careful, the oil can flame up.  

The burgers should cook for 3.5 minutes PER side on the High temp part of the grill.  

After 7 min. (they’ve been flipped once already) flip ’em again and slide them to the Medium-Low side of the grill.  

3-4 minutes more and check the temp.  You want between 155-160 degrees F.   Keep checking and flipping until you hit the temp.   Once you hit that temp, take ’em off and plate them and wrap ’em in foil immediately.

Let them sit for a little bit (3-5 min) while you prep your buns and toppings.

As Cory says, “D-E-licious!”

(PS – This pic is for you Cory.  Crooked….but still delicious!)

Happy Grilling! 

Indulge.  In Life.  In Love.  In  Food.

Creamy Mushroom Rigatoni w/ Champagne Salad

If you love mushrooms, this post is for you!   Creamy Mushroom Rigatoni has become a favorite among our closest friends and family.  My good friend Kendra calls me frequently requesting this dish and my mom as well!   Our monthly “Girls Cooking Night” has enjoyed this pasta twice since our start in Jan 2010…I promise you, you can’t go wrong with this one!    Looking for reviews?  Call my friends Ertl, Kendra, or Brooke…they all indulged in a healthy portion this week!  Seriously, Giada is a genius.  🙂

Of course, I can’t serve pasta without a side.  So this week, I paired Giada’s Creamy Mushroom pasta with my Champagne Salad.  Ryan and I have always enjoyed Girards Champagne Dressing, so with the inspiration of a local eatery’s salad, I whipped this one up! 

Enjoy your Sunday…and take time to indulge in the kitchen!

CHAMPAGNE SALAD

Serves 4-6

  • 1 bag of Mixed Greens salad
  • 1 Granny Smith Apple, thinly sliced
  • 1 cup Walnuts, toasted
  • 1 cup Feta or Goat Cheese
  • Croutons
  • Girards Champagne dressing

Directions:

First, spread walnuts out evenly on an ungreased cookie sheet.  Heat oven to 400 degrees.  “Toast” walnuts in the oven for ~3-4 minutes or until fragrant.  Remove and let cool.

Next, divide salad among bowls (servings).  Top with apple, walnuts, cheese, and croutons. 

Drizzle on Champagne dressing!

Enjoy right away…or serve with Creamy Mushroom Rigatoni…

CREAMY MUSHROOM RIGATONI

Recipe by Giada De Laurentiis

Serves 4-6

  • 1 pound rigatoni pasta (for my most recent batch, I used Campanelle, another hearty pasta)
  • 2 tablespoons olive oil (EVOO)
  • 2 shallots, minced
  • 1 clove garlic, minced
  • Salt and freshly ground black pepper
  • 1 pound assorted mushrooms, (such as cremini, shiitake and button), cleaned and sliced
  • 1/2 cup white wine
  • 1/2 cup vegetable stock
  • 1 cup (8 ounces) mascarpone cheese, at room temperature
  • 1/2 cup grated Parmesan  (I often use Romano as well)
  • 1/4 cup chopped fresh chives

Directions:

Bring a large pot of salted water to a boil over high heat. Add the pasta and cook until tender but still firm to the bite, stirring occasionally, about 8 to 10 minutes.

Heat the olive oil in a large skillet over medium-high heat.  Add the shallots and garlic to the pan.  Season with salt and pepper.  Cook until soft, about 2 minutes. 


While the shallots and garlic are sauteeing, clean and slice your mushrooms.  (I always use large bella mushrooms).  Add the mushrooms to the pan and season with salt and pepper.  Cook until mushrooms are tender, stirring occasionally, about 5 to 7 minutes.  Turn the heat to high.  Add the wine and cook for 3 minutes until all the liquid evaporates. Add the stock and simmer until liquid is slightly reduced. Remove the pan from the heat. Add the mascarpone cheese. Stir until creamy. Drain the pasta, reserving about 1 cup of the pasta water, and transfer to a serving bowl.

Add the mushroom mixture and the Parmesan.  Season with salt and pepper, to taste.   Toss well to coat pasta, adding the reserved pasta water, if needed, to loosen the pasta.

Garnish with the chopped chives. (I sent Kendra out to my “garden” to snip some fresh chives…Yum!) 


Serve immediately….with a chilled glass of Sauvignon Blanc and ENJOY!

Indulge.  In Life.  In Love.  In Food.


Scallop & Guac Bites

Wow!  What a beautiful day we had yesterday…it actually felt like summer.  Had it been the weekend, we would have whipped up some salsa…some guac and cracked an ice-cold corona by the pool!  🙂  You remember the Great Guac Recipe, right?!

GUACAMOLE

Adapted by recipes from Amanda Johnson and Delaney Loftsgaarden

  • 2 Avocados
  • 1 Serrano Pepper
  • 1 Large Roma Tomato
  • Juice of 1/2 lime
  • 2 tbsp chopped fresh cilantro
  • 1/4 Red Onion, chopped
  • Salt and Pepper to taste
As directed by Mandy, mash together with a fork and enjoy! 


With the weekend’s forecast looking just as sunny and steamy as yesterday, I thought I would share with you one of my new favorite appetizers.   (Have I mentioned my new obsession with scallops?  Seriously, I’m hooked.)  Whip up a batch of that guac I mentioned above…and you’ll have this appetizer complete in no time.
 
This appetizer is so simple, yet elegant and delicious.  What a treat! 
 

SCALLOP & GUAC BITES

Servings Vary

  • Fresh Guacamole, see recipe above or on Great Guac post
  • 4 Sea Scallops, dry and room temperature
  • Blue Corn Tortilla Chips
  • Vegetable Oil
  • Sea Salt
  • Cracked Pepper

First, prepare the guacamole.  Cover and store in the refrigerator until scallops are seared.

Next, ensure the scallops are ready to be used.  Scallops should be dry and room temperature with the “beard” removed.  The beard of a scallop is a small flap along the edge (where the scallop would have been resting inside it’s shell).  This portion of the scallop should be easily detached.  Should you leave it on, that portion of the scallop will taste like a rubber band.

Once the scallops are prepped, you are ready to sear!  If you are in my boat, searing scallops is new to you.  Have no fear…I reached out to my good friend Brandon Mandrell, the Chef, for some expert advice!

Brush both sides of the scallops with vegetable oil and season with sea salt and cracked pepper.

Place a non-stick pan on the burner and heat on high until the pan begins to put off white smoke.  Once it does, pull the pan off the burner and add 2 tablespoons vegetable oil. (Brandon taught me the importance of using Vegetable Oil for searing in place of EVOO.  In addition to a milder flavor, vegetable oil heats to a higher temperature.)  Move the pan back onto the burner and add the scallops.  Caution, at this point, the oil may splatter. (Wear long sleeves or tall oven mitts!) 

Watching closely, sear the scallops for approximately 2-3 minutes per side or until golden brown.  Control the heat by slowly moving the pan on and off the burner.  The scallop should feel firm but supple if you apply gentle pressure when they are done. 

Remove from pan. Place on paper towel to dab oil. 


Next, build your “bites”!   Top Blue Corn Tortilla Chips with a spoonful of Guacamole and finish with a beautifully browned scallop!

Delicious!  I can’t wait to indulge in a few more.

Indulge.  In Life.  In Love.  In Food.


The North Shore

It’s true.  I love to eat.  I also enjoy running.  But most of all, I love the North Shore of Lake Superior.  It all started in college.  In an attempt to escape the Cities, Ryan and I journeyed up the Shore to Duluth and beyond.  Every year we made our trip to Grand Superior Lodge, just North of Two Harbors, relaxed in a log cabin, hiked Gooseberry Falls, played endless hours of Scrabble, sipped our wine and listened/watched the waves of Lake Superior crash against the rocky shore.  After several years of these visits, we decided to tie the knot in that exact place.  In 2005, we were married in the Duluth Rose Gardens, took pictures along the Shore and in Gooseberry Falls, and celebrated the night away at Grand Superior Lodge with 125 of our closest friends and family.  And now…almost 5 years later, I decided it was time to head back that way once again but this time, to run in Grandma’s Marathon, one of the area’s largest attractions.  This winter I entered our names, along with my brother-in-law and his girlfriend, in the lottery for Grandma’s Half Marathon…and lucky us, our names were drawn!  I suppose, that makes us winners!  🙂

So last weekend, we made the 8 hour trek to Northern Minnesota.  It was a long drive…but oh-so-worth it!   To begin “carbing up” before our half marathon, we had dinner at Bellisios.  Bellisios is a WONDERFUL little Italian Restaurant and Wine Bar in Canal Park in Duluth.  You should have seen Ryan’s shrimp pasta…it was OVERFLOWING with shrimp.  When was the last time you ordered a shrimp pasta and had to leave some of the shrimp on your plate!?  If you are ever in the Duluth area, I highly recommend it.  http://www.grandmasrestaurants.com/bellisios/

The next day, we revisited the Duluth Rose Gardens and took a moment to reflect on our wedding…our marriage…our future.  I remember thinking to myself, we had such a beautiful day on Aug 20, 2005…I wouldn’t have changed a thing!  

Again, if you are ever in the area on a sunny summer day, take the time to stroll through…it is beautiful.  (http://www.superiortrails.com/duluth-rose-garden.html)  I did remind Ryan though, that should we renew our vows…this time we should hit up Bora Bora!  Good idea, right? 


After our walk down memory lane, we headed up to Grand Superior Lodge to meet up with Cory and Kelly and prepare for our run.  The question remained…what’s for dinner?  To keep it easy, we decided on Dole’s Ultimate Ceasar Salad (seriously, it is amazing…try it) and my Pasta Pomodoro.  Honestly, I love this pasta! 

But, the more I make it, the more I learn about making it correctly.  A couple of important notes: first, be sure to add enough garlic, especially if the “Diced Tomatoes with Olive Oil and Garlic” seems bland.  Our local HyVee brand is the BOMB…other brands don’t seem to be as heavy on the olive oil and garlic…so add more of each!    Secondly, make sure the sauce comes to a full boil and allow the sauce to simmer for at least the 20 minutes.  With limited kitchen supplies in our cabin, I tried skipped the full boil and cut the simmer time in half when I made this for Cory & Kelly…withouth question, I was disappointed in the final product.  The flavors just weren’t the same.  Lesson:  be patient.  (Not one of my strongest virtues.)

PASTA POMODORO

Serves 4 -6

  • 2 cans (28 oz) whole, peeled, tomatoes.  Drain & Crush by hand.
  • 2 cans petite diced tomatoes with garlic and olive oil
  • 1/2 cup EVOO
  • 1 Sweet yellow onion, chopped
  • 2 Garlic cloves, finely chopped
  • Kosher Salt & Black Pepper, to taste
  • 1/2 cup Fresh Basil leaves, torn
  • 1 cup Mozzarella, freshly grated
  • Spaghetti noodles, cooked & strained

Start by making the pomodoro sauce.  This will allow for the flavors to meld while you prep the rest of the meal.

In a large saucepan, heat EVOO over medium-low heat.  Add the onion and garlic and cook until soft, ~5 minutes.  Add the diced and crushed tomatoes.  Season with salt and pepper.  Cook for ~15 minutes.  Bring to a boil, stirring for 2-3 minutes to break up tomatoes.  Reduce heat and simmer for ~20 minutes. 

Stir in the fresh basil.  Taste and adjust the seasonings.

While the sauce is simmering, bring water to a boil.   Cook pasta until al dente.  ~ 9-10 minutes or as indicated on the box.  Strain pasta.  Immediately top with sauce to help retain heat.   Enjoy!

With a system full of carbs and nutrients, a well-hydrated body, and an ambitious spirit, the 4 of us headed to the start line at 445am.  Crazy, yes.  At 630am…we were off to the races!  Kelly and I learned a real quick lesson on trying to run 13.1 miles without training!  HA!  NOT a good idea…but we finished!  Our better halves however, blew us away.  Cory came in just over 2hrs and Ryan, well he “demoralized” all of us with a fast and furious 1 hr and 45 minutes.  No training (hardly)…and his first half marathon…impressive.  Congrats Buddy!  You deserve that “victory” pose!  LOL 


All in all, our weekend on the North Shore was nothing less than spectacular!  With a great atmosphere, great  food, a great run, and great family (Troy, Laurie, Cory & Kelly)…this weekend was one for the record books.  Thank you Cory and Kelly for joining us on this run! 

And a big thank you to both of our brothers and sister for making the celebrations back at the cabin so enjoyable.  We love you!

The North Shore of Lake Superior…just another slice of heaven.

Indulge.  In Life.  In Love.  In Food.


Grilled Peaches

Good Morning and Happy Monday!  If you are living in the Iowa City area…it appears we are in for some more rain…perhaps lots of it.   To bring a  little sunshine into your day, I wanted to share “Grilled Peaches” with you.  I found this recipe in my Sunset Grill cookbook…and believe me, this recipe is WONDERFUL.  Anyone close to me will tell you that I am not a huge fan of dessert.  Throw some cheese or salty apps in front of me and I’m a happy girl!   But every now and then, a fresh ice cream dessert hits the spot.  You’ve got to try this one…even if it’s raining outside!

GRILLED PEACHES with Vanilla Ice Cream

Serves 4

  • 2 tablespoons light brown sugar
  • 1/2 teaspoon cinnamon (I added extra)
  • 4 fresh peaches
  • Extra Light Olive Oil
  • Vanilla Ice Cream

To begin, prepare your grill for cooking over indirect heat.  (For example, on our gas grill, we have front and back burners.  Once the grill was hot, I turned off the back burners and grilled my peaches on the rack above those burners.)  First, brush olive oil on the grill rack.  Turn all burners to high and close lid.  When the grill is hot, lift the lid and turn off one of the burners. 

In a small bowl, combine the brown sugar and the cinnamon.  Cut the peaches along the seam all the way around and twist the halves off the pit.  Brush the cut sides with the olive oil.


Lay the peaches, cut side down, on the grill rack over direct heat until the fruit has grill marks, ~3-4 minutes. 

Brush the tops with oil, turn over, and move to the area of indirect heat. 

Sprinkle the cut sides with the cinnamon sugar.  Cover the grill and cook until the sugar is melted and fruit is tender, 10-15 minutes. 

Serve with vanilla ice cream….

and sprinkle on extra cinnamon sugar if you like.  Enjoy!

Have a great week…rain or shine.  🙂

Indulge.  In Life.  In Love.  In Food.


Dilled N Grilled Salmon

Dilled N Grilled Salmon with Green Beans and Wild Rice….I want to say I owe this one to my in-laws, Rick & Phyllis Boudreau!  I think I remember them making us some salmon years ago and topping it with Jimmy’s Dill Dip…from there, we threw together this meal.  Mmm mmm mmm…SO GOOD!  And I’m not going to kid you, this is one of Ryan’s specialties…I leave most of the salmon grilling to him!

Ryan and I started preparing this meal several years ago and always look forward to this light but flavorful dinner.  It is so fast and easy to whip up after a long day at work…and yet leaves you feeling like you enjoyed a restaurant-quality meal!  If you like salmon and you don’t mind grilling, try it this summer.  You’ll love it for all those same reasons!  🙂

DILLED N GRILLED SALMON w/ Green Beans and Wild Rice

Serves 4

  • 1 box of Uncle Bens Wild Rice (Fast cook recipe; prepare as indicated on box)
  • 1 lb Green Beans, trimmed on each ends
  • 2 tbsp Extra Light Olive Oil
  • 2 tbsp EVOO
  • Salt and Pepper
  • 4 Salmon filets, size of your preference (in this case, we used 5oz filets for a lighter meal)
  • 2 Small Jimmy’s Dill Dips (individual serving sizes)

To start this meal, you’ll want to preheat your grill to 400 degrees, trim green beans, and begin boiling 2 pots of water (one for the rice and one for the beans).  While the grill preheats, begin to prepare the rice as indicated on the package. 

Once the grill has preheated to 400 degrees, brush grill with  2 tbsp Extra Light Olive Oil to prevent the salmon from sticking.  With the skin on the salmon, brush top of filet with a thin layer of Jimmy’s Dill Dip.  Place the filets on the grill, skin side down for ~7 minutes.  (Grilling time will vary based on your likeness.)

At ~7 minutes, flip the salmon and remove the skin.  Continue to grill for ~7 minutes on that side.


While the salmon is grilling those last 3 minutes, drop beans into boiling water.  Boil for a brief 3 minutes and drain.  Put beans back into warm pot, drizzle with 2 tbsp EVOO.  Season with Salt & Pepper.

Once beans are done, pull the salmon off the grill and immediately serve with wild rice!

And for those of you who especially love dill, top yours with a little extra sauce!  🙂

As always, serve with a chilled glass of Sauvignon Blanc and indulge!

Indulge.  In Life.  In Love.  In Food.

Tuscan Open Face Sandwiches

It was just a few weeks ago that our good friends, Jeremy & Sara Schwertfeger, joined us for an afternoon by the pool.  I sent Jeremy a text to see what they were up to…and little did I know, they were just waiting for a text to be invited over to the pool!  Ahh…our universes must have been aligned.  🙂

With the sun beating down and the yard work complete for the day, I was exhausted, ready to relax…and my Red Wine Spritzers were ready to go!  Lucky for us, Jeremy and Sara surprised us with an AMAZING new snack…one that they enjoyed on their trip to Italy last fall.  (Interestingly enough, they made their trip to heaven…I mean, Italy, just 2 weeks before we did!).  I couldn’t resist sharing their Tuscan Open Faced Sandwiches with you…because it is a new favorite of mine!  Thank you J and Sara!

TUSCAN OPEN-FACED SANDWICHES

Recipe by Jeremy & Sara Schwertfeger

Servings Vary

  • Crackers (Sara brought Triscuits Fire Roasted Tomato and Bretons)
  • Classico Basil Pesto
  • Fresh Mozzarella Cheese, sliced
  • 1-2 Green Apples, thinly sliced
  • Deli Turkey, thinly sliced

Prep your ingredients and begin building your sandwich. 

Layer green apple, turkey, mozzarella, and top with a dallop of pesto! 


Open wide and take a big bite!


DELICIOUS!!  You have got to try it…and you have got to check out Sara’s blog as well.  Sara is a Registered Dietician who specializes in Nutrition and Lifestyle Coaching.  Her blog address is: http://www.sarabconsulting.blogspot.com/

And to thank her for this amazing treat, I decided to pot her some basil!  As you can see, my basil is still growing and dividing beyond control. 

With strong new roots, I started Sara her own Basil source.  After all, she is one person I thought might enjoy cooking with it as much as I do! 

Thanks again Sara! 

Indulge.  In Life.  In Love.  In Food.

Great Friends, Great Guac, Great Enchiladas!

Hola Amigos!  Let me apologize for nearly a week without an updated post.  Today I travelled home from Dallas, where I celebrated a successful FY10 with Medtronic at our Global Sales Meeting.  I look forward to sharing some of those stories with you later this week.  In the meantime, I want to reflect back on Cinco de Mayo…and the leftover pork from our Luau.

More than a month ago, Ryan and I celebrated Cinco de Mayo with our dear friends, the Knittels…Bonnie, Matt, and Keaton.  I met Bonnie when I worked for Hamilton College in Cedar Rapids, IA, more than 5 years ago.  Bonnie can light up ANY room with her laughter.  Thank you Bonnie and Matt for inviting us into your home, preparing a delicious meal, and offering great conversation!  We are so lucky to have you near (though being next-door neighbors in Iowa City would be even BETTER!)

To contribute to this meal, I decided to attempt a new homemade salsa and guacamole.  The salsa was good…but I didn’t love it…so I am not going to post it.  The next time I find a good one…you will see it here.  🙂

As for the guacamole, well that was fabulous!  Two of my closest friends in Minneapolis sent me their recipes…and naturally, I combined the two.  Thank you Mandy and Delaney!  If you love guac, you’ll love this one!

GUACAMOLE

Adapted by recipes from Amanda Johnson and Delaney Loftsgaarden

  • 2 Avocados
  • 1 Serrano Pepper
  • 1 Large Roma Tomato
  • Juice of 1/2 lime
  • 2 tbsp chopped fresh cilantro
  • 1/4 Red Onion, chopped
  • Salt and Pepper to taste
 
 
As directed by Mandy, mash together with a fork and enjoy! 


And like Delaney said, “Everyone should know how to make great guac!” 

Agreed!  I know I loved it…but from the look on Bonnie’s face, so do many others!

After we indulged in a good helping of chips and guac, we dove into Matt’s enchiladas.  Let’s be honest, I usually don’t cook with a lot of pre-packaged ingredients, but they too have their place…especially in busy households.  Ryan and I both thoroughly enjoyed this meal!   It was one of those meals that I couldn’t wait to make at home.  And with an abundance of pork left over from the Luau, I figured it was the perfect opportunity.  All I had to do was substitute pork for chicken.  Next time you are in the mood for homemade Mexican, try this…it is so easy.  Thanks again Matt!

GREEN CHILE ENCHILADAS

Recipe from Matt & Bonnie Knittel

Serves 8

  • 1 lb Uncooked Chopped Chicken (I used shredded pork, cooked. It still turned out perfectly!)
  •  1 pkg 8oz Cream Cheese
  • 1 can (4.5oz) chopped Green Chiles
  •  2 cans (10 oz each) Green Chile Enchilada Sauce
  • 1 pkgs Taco Seasoning (I used Hot & Spicy for extra kick!)
  • 1 can Black Beans
  • 3/4 cup shredded Cheddar cheese
  • soft shell tortillas (yields 8 using 10″ shells)
  • Zatarains Black Beans and Rice, prepared as directed on box.
  • Sour Cream
  • Salsa


Heat oven to 400 degrees and spray 13×9 glass baking dish with cooking spray.
In skillet, cook chicken, stir in cream cheese, chiles, beans and seasoning.

Cook and stir until blended and cheese is melted.
Spoon chicken filling onto tortillas, roll up and place seam down in dish. Pour enchilada sauce over tortillas; sprinkle with cheese.

Bake 15 to 20 minutes.  Broil on high for 2-3 minutes, or until golden brown.

Serve with Zatarains Black Beans and Rice and top with sour cream and salsa.   Delicioso!

Indulge.  In Life.  In Love.  In Food.


Aloha! Tasty Luau Grub…

 Hele Mei Hoohiwahiwa!  (Come celebrate with us!)

May 2010 brought about two major milestones for my family.  My dad, the funniest man I know, turned 60!  And my husband, my best friend, turned 30!   With 2 good reasons to celebrate, I invited all of our family and friends to “Lake Boudreau” (that would be our pool – LOL) for a Birthday Bash Luau.  While the weather didn’t cooperate as best it could, we made the best of our day!  There was plenty of pool volleyball, red wine spritzers & mai tais, yard games, and plenty of Luau Grub.  In fact, there were 3 recipes that I just couldn’t resist sharing with you.  They are a few more of my “Must-Trys”!

I started my day early with a trip to HyVee to pick up all of the groceries to prep this feast.  By 845am, I was back home, food and liquor in hand!  Fortunately, my friend Brandon Mandrell (who is also a Chef) was waiting in my driveway to help me!

Over the span of 5 hours, we put together Hawaiian Slaw, fresh Fruit Bowls, Baked Beans, Pomegranate Chipotle Pineapple Bites, Roasted Red Pepper Shrimp Skewers, and a couple big dispensers of Red Wine Sprizers and Mai Tais.   Brandon, you were a tremendous help and a joy to have in the kitchen with me.   Thank you!

The main dish however, was delivered to the house.  We were hosting a Luau…so in true Luau fashion, we ordered up a Pig Roast.  I’ll be honest, I had no idea what to expect, but it was a fabulous experience (once I got past the idea of a 100lb pig laying on the table). 


Once we all took some pictures and got used to the idea of a hog roast, I let Brandon do the carving…and I followed with the shredding…


I could hardly believe how much meat there was to go around.  I’m pretty sure we will be eating pork for weeks!  Luckily, we still have lots o’Hawaiian Slaw to go with it. 

I don’t know about you, but I am not generally a coleslaw kind-of girl.  But for this party, I knew we needed slaw…slaw with a hawaiian twist.  For your next BBQ, give it a whirl.  I loved it!

HAWAIIAN SLAW

Serves 8

  • 1 bag of Coleslaw
  • 1 bag of shredded cabbage
  • 1 (8 ounce) can Pineapple, drained and crushed
  • 1 (8 ounce) can Mandrin Oranges, drained
  • 1/4 cup Raisins
  • 1/4 cup Pecans, chopped and toasted
  • 1/4 cup Coconut, flaked and toasted
  • 3/4 cup Marzetti® Slaw Dressing

In mixing bowl, combine all ingredients except coconut and pecans. Mix well.

On one baking sheet, evenly distribute chopped pecans.  On a second baking sheet, evenly distribute coconut.  Heat oven to 350 degrees.  Place pecans and coconut baking sheets in oven for ~5 minutes.  Watch closely.  When nuts and coconut start to brown, remove from oven and cool.


Add pecans & coconut to mixing bowl with the rest of the ingredients.  Mix well and chill until serving.  YUM!

As our guests waited for the main meal to be served, Brandon and I whipped up a couple finger foods to tie everyone over.  I had hosted a Tastefully Simple party just a few weeks back and with the help of Sharon Langenberg, the Tastefully Simple Representative, came up with a couple GREAT ideas!  Sharon recommended Pomegranate Chipotle Pineapple Bacon Bites and Roasted Red Pepper Shrimp Skewers.  Both of these apps were delicious…I swear…but the PCPB Bites were OUT OF THIS WORLD.  Not kidding.  Ask anyone at the party…they were TO DIE FOR.   For your next gathering, these little bites of heaven are a MUST. 

POMEGRANATE CHIPOTLE PINEAPPLE BACON BITES

Servings Vary  (More = Better!)

  • 1 Pineapple, cut into chunks
  • 1 Package of Bacon (I chose Applewood Smoked Bacon)
  • 1 Bottle of Pomegranate Chipotle Sauce from Tastefully Simple

Simply cut pineapple into bite-size chunks.  Wrap each chunk of pineapple in a half slice of bacon.  Secure with a toothpick.  Bake at 350 degrees until bacon is cooked to desired crispiness.

Remove PCPB Bites from oven and immediately brush with TS Pomegranate Chipotle Sauce.  CHOW DOWN.  There’s NO way you can eat just one!! 


So you are probably wondering how you can get your hands on this heaven-sent sauce?!  Let me help you.  If you would like to order some of the Pomegranate Chipotle Sauce from Tastefully Simple, just shoot me an email (robinkattre@hotmail.com) or feel free to contact Sharon Langenberg directly.  I have attached her information below.

Before I give you that information though, there is one more recipe that I found through Tastefully Simple….Roasted Red Pepper Shrimp Skewers.  Check it out:

ROASTED RED PEPPER SHRIMP SKEWERS

Servings Vary

  • 2 lb bag of shrimp, thawed and peeled
  • 1 jar of Tastefully Simple’s Roasted Red Pepper Jam
  • Wooden Skewers, soaked in water prior to using.

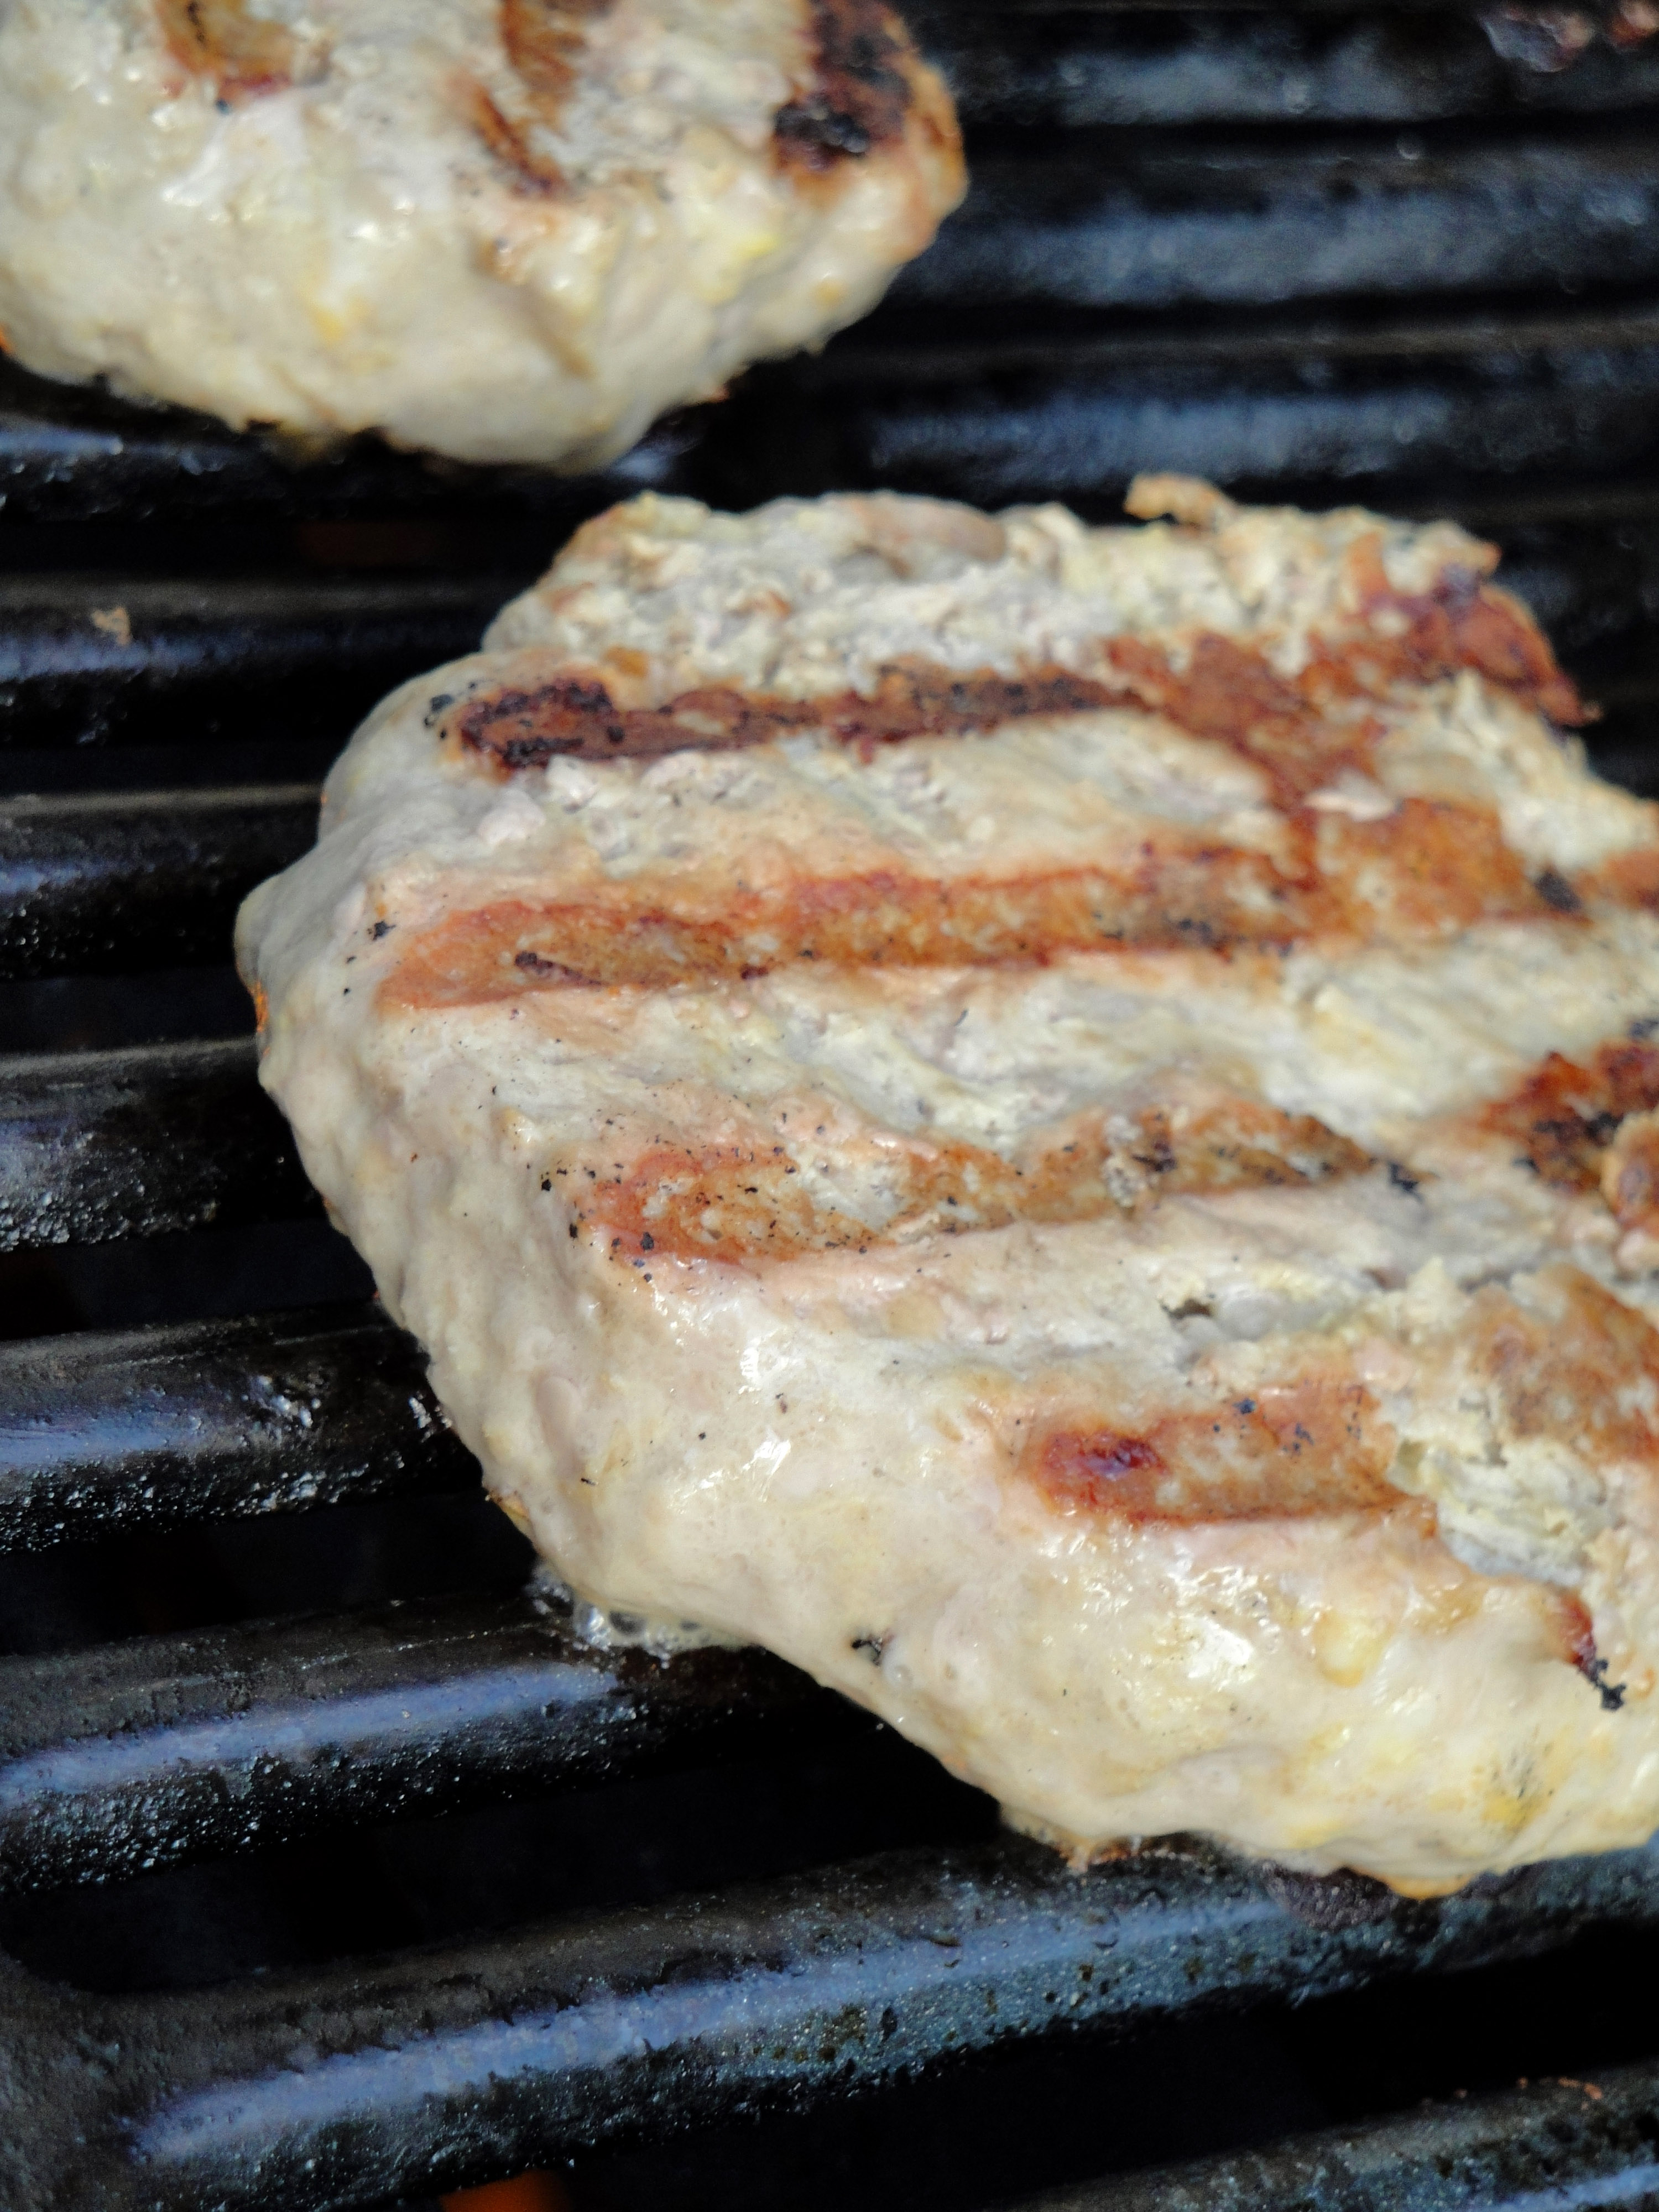
Preheat grill to 350 degrees.  Skewer shrimp (I did 3 shrimp per skewer).   Place skewer on grill and cook for ~2 minutes per side.  Watch closely as grilling time will vary based on the size of the shrimp.  Remove from the grill and brush on Roasted Red Pepper Jam. 

Again…delicious finger food…just ask these two crazy friends of mine…I believe Kendra’s response was, “Nummy in my Tummy!”

If you would like access to this sauce/jam as well,  shoot me an email (robinkattre@hotmail.com) or feel free to contact Sharon Langenberg directly. 

SHARON LANGENBERG

Tastefully Simple

319.846.9346

tsbylangenberg@gmail.com

And last but not least, I had a giant beverage dispenser of Red Wine Spritzers!  It’s not a party without the Boodro Spritzers!  🙂

RED WINE SPRITZER

  • 4 Bottles of Crane Lake Merlot  (Substitute any cheap red wine of your liking – box of Franzia Merlot?)
  • 2 – 2 Liter Bottles of Diet 7Up
  • Lots o’Lemon

This time, I made spritzers by the pitcher….well, dispenser really.  Begin by filling your dispenser with ice.  Squeeze 2 lemons into the container.  Add 4 bottles of red wine and 2 – 2 liter bottles of diet 7Up.  Float lemon slices on top!

All in all, I think the Luau was a success!  Would we have appreciated more sun, of course.  But I prayed for dry weather, and for the most part, that is what we had….along with lots of laughter, splashing in the pool, time with family and friends, and great grub!  For those of you who traveled near and far to attend, thank you.  Our house is not a home without you to share it with!

To my Dad…

and my Husband, Happy Birthday! 

I love you both.  Aloha!

Indulge. In Life.  In Love.  In Food.

Pasta Pomodoro & Peonies!

These are a few of my favorite things…Pasta (you already knew that) and Peonies! 

Ryan and I have been so blessed with wonderful neighbors since our move to Iowa City 7 yrs ago.  (First of all, SEVEN years ago?!  I can hardly believe we’ve  been here that long.)  In our first home, on the East side of Iowa City, we enjoyed Sara & her furry friend Pez on one side of us and Jennifer and her 2 daughters Bridget & Muriel on the other.  I remember sobbing the day we moved..(just to the other side of town mind you)…I hate goodbyes.  And now, on the West side of Iowa City, we have more amazing neighbors.  Stan, to the South of us, has become one of my favorite people!  He calls me, “Miss Robin” and is always around to chat with me in the yard, give me advice on the endless schrubbery & plants I inherited, and keep an eye on me when Ryan is gone!   I love his company.  This past weekend, he surprised me with a big vase of peonies (fresh from his yard!). 

Aren’t they beautiful?!   What a thoughtful & amazing gift.  If you read this Stan, Thank You!

For dinner that same night, I had planned to make another one of my favorite pastas…Pasta Pomodoro.  In Italy, I ordered this pasta every chance I had.  It’s simple…Pasta and Pomodoro (tomatoes).  It is similar to what we know of as “Spaghetti/Marinara” in the States…but much more fresh (in my opinion).  Try it once…you’ll see the difference!  Pasta Pomodoro is a great tomato-based pasta for summer nights…

PASTA POMODORO

Serves 4 -6

  • 2 cans (28 oz) whole, peeled, tomoatoes.  Drain & Crush by hand.
  • 2 cans petite diced tomatoes with garlic and olive oil
  • 1/2 cup EVOO
  • 1 Sweet yellow onion, chopped
  • 2 Garlic cloves, finely chopped
  • Kosher Salt & Black Pepper, to taste
  • 1/2 cup Fresh Basil leaves, torn
  • 1 cup Mozzarella, freshly grated
  • Spaghetti noodles, cooked & strained

 Start by making the pomodoro sauce.  This will allow for the flavors to meld while you prep the rest of the meal.

In a large saucepan, heat EVOO over medium-low heat.  Add the onion and garlic and cook until soft, ~5 minutes.  Add the diced and crushed tomatoes.  Season with salt and pepper.  Cook for ~15 minutes.  Bring to a boil, stirring for 2-3 minutes to break up tomatoes.  Reduce heat and simmer for ~20 minutes. 

Stir in the fresh basil.  Taste and adjust the seasonings.

While the sauce is simmering, bring water to a boil. 

Cook pasta until al dente.  ~ 9-10 minutes or as indicated on the box.

How do you know when the pasta is al dente?

When it is slightly firm and still sticky enough to stick to the wall! 

Strain pasta.  Immediately top with sauce to help retain heat.   

Garnish with  freshly grated mozzarella…

And dig in! 

Indulge.  In Life.  In Love.  In Food.